


RESTORATION PROJECT - 5
January 2008
Just getting into the new year and by the end of January the project will have reached
its first anniversary; the plan is to have my new GP200 on the road by the end of April
2008 at the latest, which should easily be achievable providing there are no major
unexpected snags.
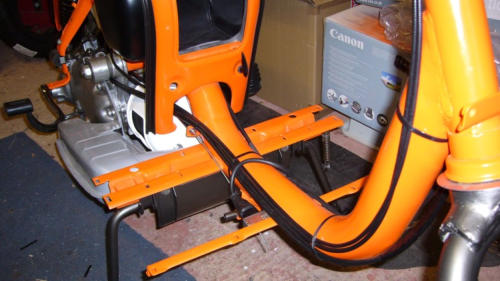
So control cables and wiring are all tie rapped into place and I must just mention here
'The Complete Spanners Manual' for Lambretta Slimstyle Scooters which really does
provide a wealth of information right down to exactly where to put the cables and in
what order etc. Here's a shot of that work in progress:
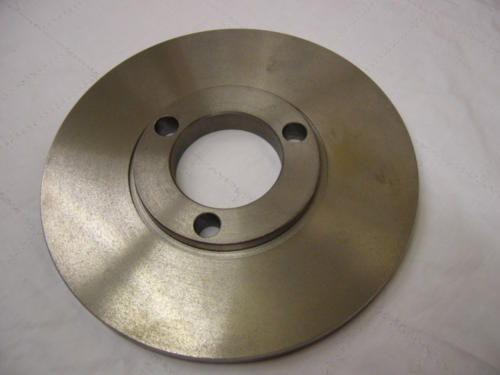
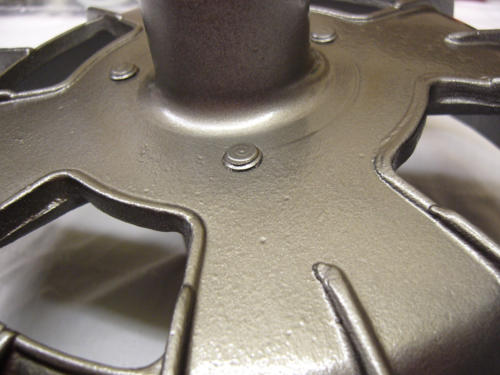
The three holes in the disc were too small, so rather than the disc 'floating' on the pins,
it was virtually an interference fit, so these had to be drilled out.
Fortunately I noticed that if the speedometer drive was threaded in all the way it
became 'locked' and would have stripped the nylon worm drive if it had been used like
this. The solution was to fit a suitably sized 'O' ring (not supplied).
The outer casting should rotate freely around the inner casting, however it required
approximately 2 to 3mm to be removed from some areas to achieve this. Finally I had to
grind 1mm off the back of the static pad otherwise there was insufficient clearance for
the disc to fit between the two pads.
Personally, the combination of all of the above is more than I would have expected to
have to do in order to assemble the kit and feel a little more attention to detail in the
design and manufacture of the unit would make this a much better product, not to
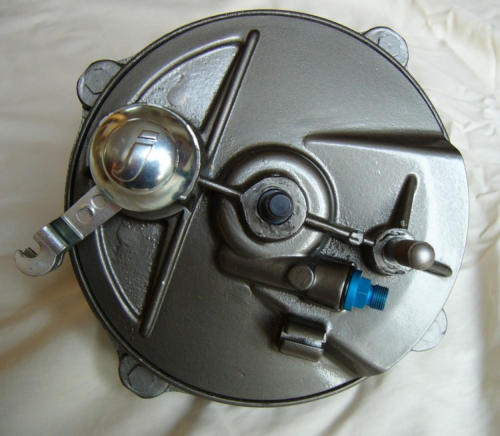
mention including some instructions. Hopefully this information may be useful to anyone
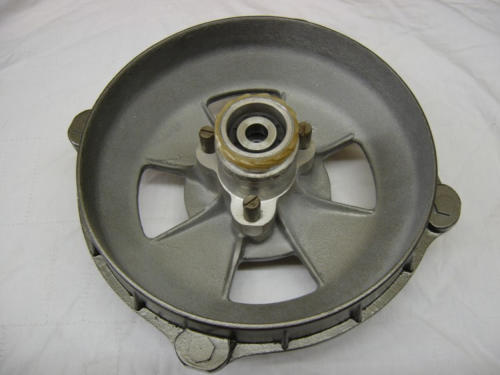
else who may be considering purchasing a 'remade' Disc Brake. Here's an image of the
completed Disc Brake ready to go.
Next were the front forks and Disc Brake; forks not a problem, however I can't say the
same for the Disc Brake. As this was originally a 150cc and fitted with a drum brake I
bought a remade original style 'Lambretta' Disc Brake. The Brake is supplied in kit form
and on arrival looked good, however no instructions are provided just an exploded view,
so if you have never built a Disc Brake before you might struggle a little with order of
assembly and orientation of some parts.
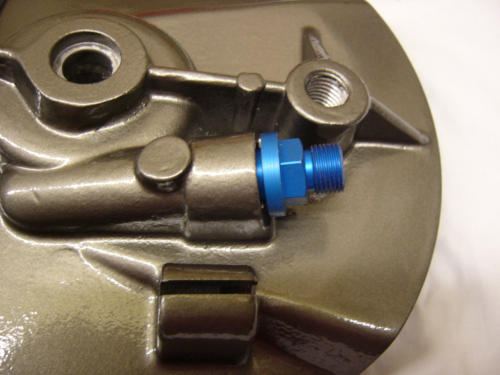
I was, perhaps naively, expecting to just assemble the parts, but on checking the fit of
the various components it became clear that the brake was going to require a degree of
fettling. The three pins that the disc 'floats' on are screwed into the outer housing and
I'm probably being fussy but they are slightly too long and protrude from the face of the
outer casting - see image.
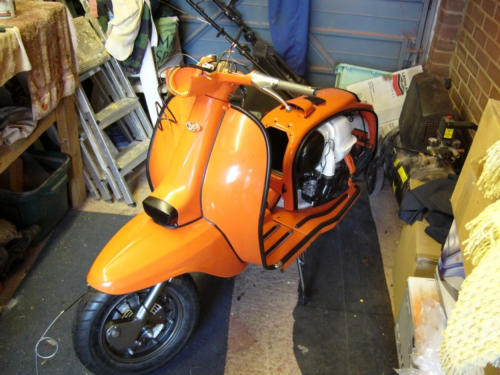
OK, so after the minor drama of the Disc Brake I moved on to fitting the legshields
which is one of those jobs I felt quite quite nervous about, manipulating them into place
without damaging the paintwork, but fortunately with great care and a few strategically
placed rags all went well.
Another job I was not looking forward to was fitting the plastic strips in the aluminium
tracks to form the legshield runners. However the 'Spanners Manual' came to the rescue
again; the technique is to roll the plastic strips into the aluminium tracks and in the cold
weather, leave the plastic strips in hot water first to thoroughly warm up, this all makes
the job really simple.


Legshields were quickly followed by the handlebars and front mudguard, along with the
petrol tank and air filter box.
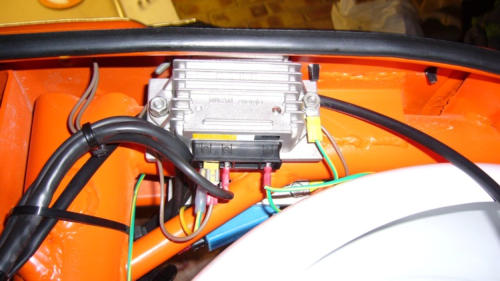
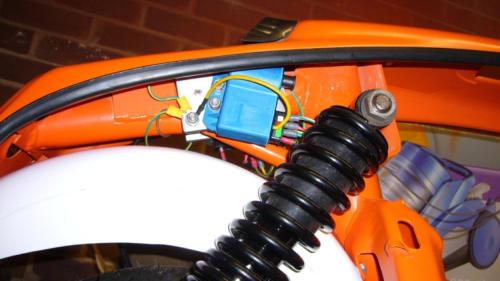
Once the control cables were fitted I set about connecting all the electrics and started
off by making a couple of brackets from 6mm aluminium plate to mount the CDI unit
and the Regulator; you can buy this kind of thing of coarse but they appear to be very
expensive for what they are. Here's my version:
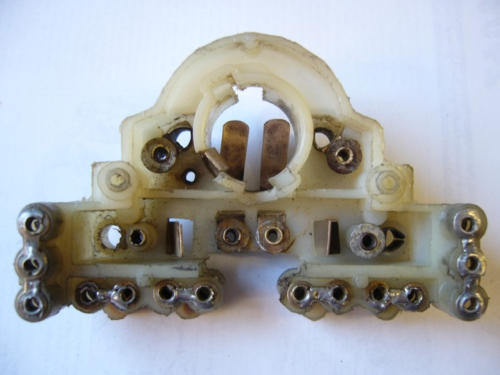
I picked up a tip from the Lambretta Club of Great Britain web site which suggested
soldering all the joints on the front headlamp holder as they can actually be quite loose;
this I thought was a good idea and promptly got the soldering iron out.

Also to clean all the strips and connectors I left the whole unit submerged in vinegar,
which being a mild acid does clean rather well. I was a bit concerned about the effect it
may have on the plastic but threw caution to the wind and did it anyway and can report
no ill effects so far, but I did clean the whole thing in soapy water to ensure all traces of
vinegar were removed.
All connections were then made and the only slight confusion was the new headlamp
high-low / horn switch which had a couple of wires that did not conform to the standard
colour code, however this was easily sorted using a bit of common sense, although I'm
not sure where that came from! Just to check that at least the ignition was working I
turned over the engine to confirm I was getting a spark, which I was, so time to move
on.
February 2008
Well the project really is in the final stages, the bodywork is all assembled and even
sports a very nice all black Ancillotti dual seat; cables and electrics all done, although I
wont be able to check the lighting until I have the engine running.
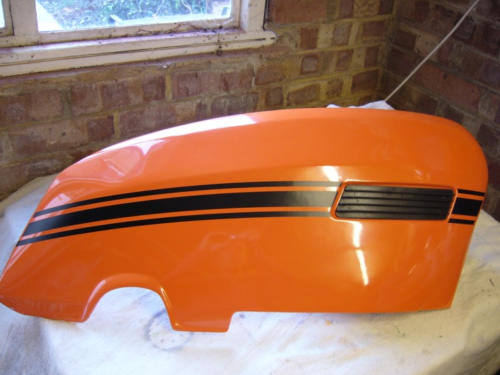
A few small jobs left to do, fitting legshield badges and side panel stripes, both of which
make me a bit nervous. Fitting of the badges was rather nerve racking due to the fact
that you have to use a hammer and centre tap, but with great care and protecting
paintwork around the working areas with masking tape this was completed without any
disasters.
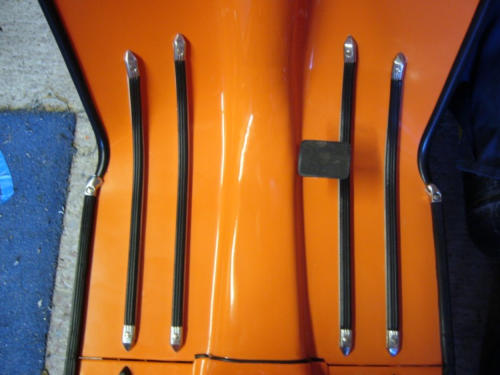
Next were the panel stripes and the trick with these is to mark the panel with the
position of the stripes and then to 'float' them on soapy water, get them in the correct
place and then gently towel off excess water and finally carefully dry with a hairdryer.
Here's how they turned out.